Flat Roof Counter Flashing
Flat Roof Counter Flashing Repair
- Category: Blog Articles
- Written by Administrator
Roof Flashing Replacement on a small flat roof over a garage near Cleveland, Ohio.
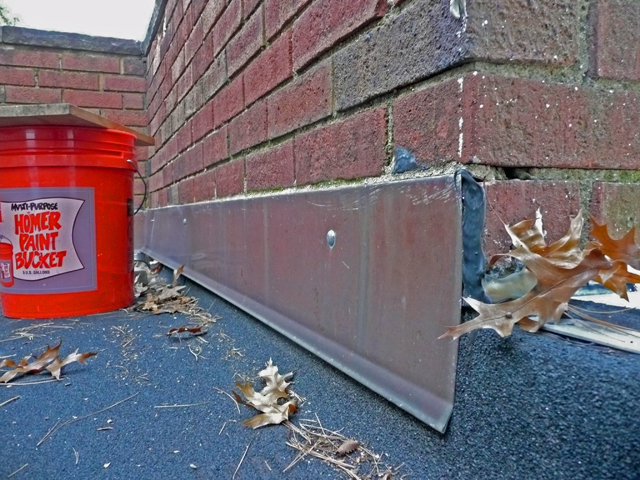
The original roof counter flashing(shown bottom picture) was leaking at the brick mortar / flashing joint. The construction and installatiion of the flashing was allowing water to slowly seep into and behind the flashing and into the interior of the garage. The flashing metal installed by the previous roofer was bent into a shallow groove cut into the brick mortar joint, and held in place by expanding fasteners drilled through the flashing and into the brick. The mortar used to seal the flashing to the brick was insufficient and poorly installed. The flashing was bent and installed in such a way that it pushed up into the joint area and there was little room to install the mortar properly.The flat roofing material, a modified bitumen roll type material, was in good shape and should last for another 7 yrs or so.
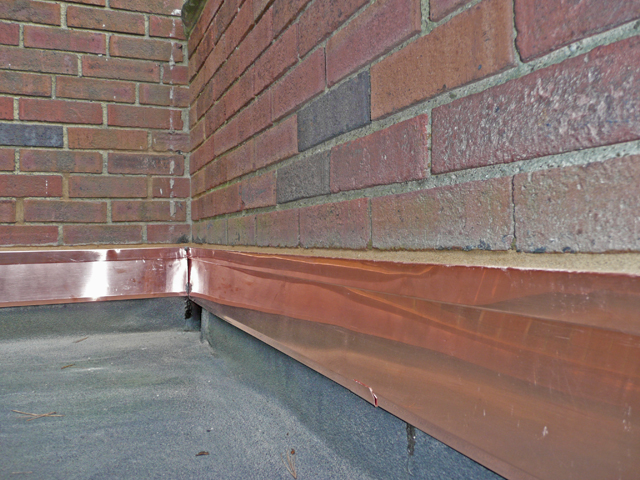
We removed the fasteners from the front of the flashing and it easily slid out of the mortar joint. We then cut out the mortar joint both deeper and wider to accept the new flashing.
The new counter flashing was fabricated as a two part system. A cap, or receiver, with a raised lip at the back that slides into the mortar joint and is held in place with lead. And a lower piece that covers the flat roofing material. The lower flashing has a hem at the top that slides into a hem fabricated into the bottom edge of the cap. The bottom flashing piece is held in place against the wall by a copper cleat fastened behind the metal. New mortar seals the brick joint.
d